Tuesday, April 02, 2013

It's more difficult than it looks: Cracking & Explosions
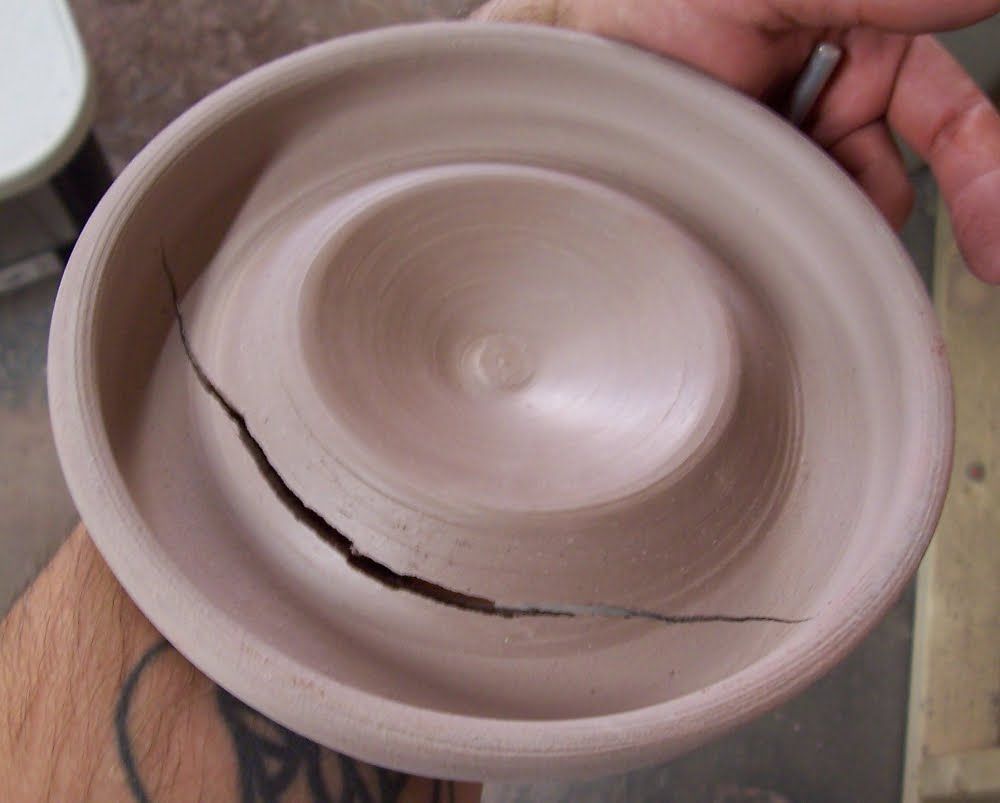
cracked pot, cracked ceramics photo crack4BIG_zps8ed14ad3.jpg

Next in my series of posts on "It's more difficult than it looks" comes something very natural to most clay -- cracking.

There are a few things that most people may not know about clay.  First is that "clay has memory"... meaning that the clay platelets that make up clay needs to be completely mixed evenly or else any settled clay may form cracks.  These cracks can form in the drying or more annoyingly in the firing stages.  Unevenness can happen if a piece is bumped, banged or pressed between the forming of the piece, all the way up until it is bisque fired.  Some clays are more forgiving, allowing slight mistakes in how it was handled, but others less plastic like porcelain, crack.

Cracks come in all shapes and sizes.  As with the example I found online, this one looks to be due to possible different thicknesses of the piece (uneven) and possibly a compression of clay wasn't done as well as it should have been.  These types of cracks aren't the type you can usually salvage.  If it cracked as it was drying, you can at least melt the piece down and reuse the clay.  If it's fired, if you have the right equipment, you can grind up the bisqued item into grog which can be used in clay to make the clay more workable.  Most people, however, just throw out those broken pieces.

I bring up explosions.  It's exactly what you'd think it is by the name.  Pots will explode in the kiln with much vigor. When air and moisture is trapped in the clay as it is fired in a kiln, the fast evaporation shocks the piece and will cause said explosion.  Explosions can be small or large enough that the shattered pieces can fly into other pieces, breaking them.  Pieces need to be bone dry before they are fired as well as a slow, even kiln firing.  Too fast of a ramp up can cause shock to the pieces.

So, sometimes someone else can damage your piece without them meaning to.  This just adds to the sometimes unpredictable nature of ceramics.

Labels: , ,

Tuesday, July 31, 2012

It's more difficult than it looks: S-Cracks

My friend, Tim Whitcomb, suggested that I start writing about how tricky clay really is as a medium.  The reason is that, for some reason, people will sometimes walk by a display (whether it's my work, a friend or even in a museum) and say, "well, I can do that."  I realize that this is a typical comment about many arts, that for some reason, people have a tendency of belittling the arts in general and think that "it's child play."  But whatever the reason they do it, from really having the ability or not, I feel that I want to go over some of the pitfalls of clay work in an effort not to scare those away from working in it, but to give you all a better idea that it's a lot more difficult than it looks.

Standard clay (the type you fire in kilns) is somewhat tempermental because clay has "memory," as in, it is made up of platelets that settle into patterns depending on how the clay, and they, are worked.  Some clays are more sensitive than others.  This clay memory can be both good and bad depending on how you work the material.  The idea is to make sure that all the platelets are even and formed in a way that are harmonious onto itself.  If the platelets are uneven, not compressed, or going all in the same directions, you will tend to get cracks, warping and breaking.

Today, I wanted to show an example of the "S-crack" which happens when the bottom of a piece (be it a bowl, plate or what-have-you) is not compressed well enough when it is being thrown.  Because of the centrifical force of the wheel, the platelets are being pushed all in the same direction.  While throwing, the potter will not see any issues with the piece until it dries and sometimes, only when it fires will the cracks appear.


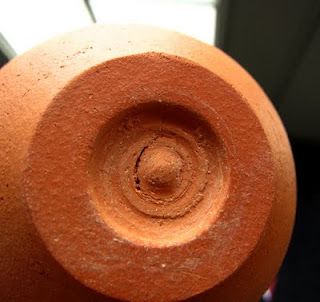
Example of a small S-Crack is here on this bowl from Dirt Kicker Potter.

The best way to avoid these cracks is when you are throwing your piece either run your thumb or a wet sponge on the bottom of inside of your piece.  Run from the center to the wall and back again, compressing down several times, smoothing the inside floor of the piece.


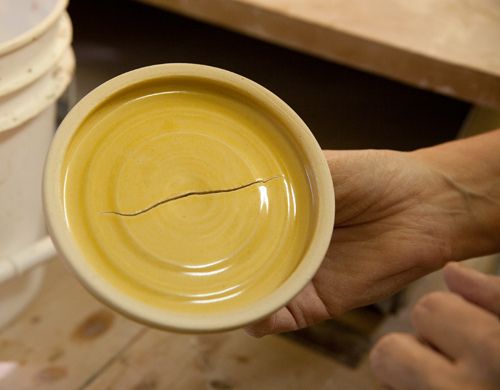
Another example of a, S-Crack on a plate, this one going all the way through the piece.  From DIYDELYRAY.com.

It's always a good idea to make sure all your walls are fully compressed and smooth before you cut off the wheel and trim.  This should help avoid most S-Cracks and general simple cracking in general.


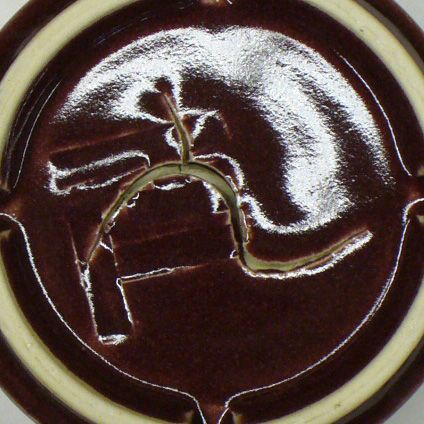
Another sample S-Crack from digitalfire.com.

Labels: , , , , , ,


 TOP 

©2002-8 Mercy Neumark. All Rights Reserved.
No part of this website may be reproduced without express written permission of the author.
RakuRakuTei.com | P.O.Box 9957, Canoga Park, CA 91309 |
mercy@rakurakutei.com